This is about
Tech
8 minutes
02 Jun 2022
This is about
Tech
8 minutes
02 Jun 2022
Using trigonometry to animate direction
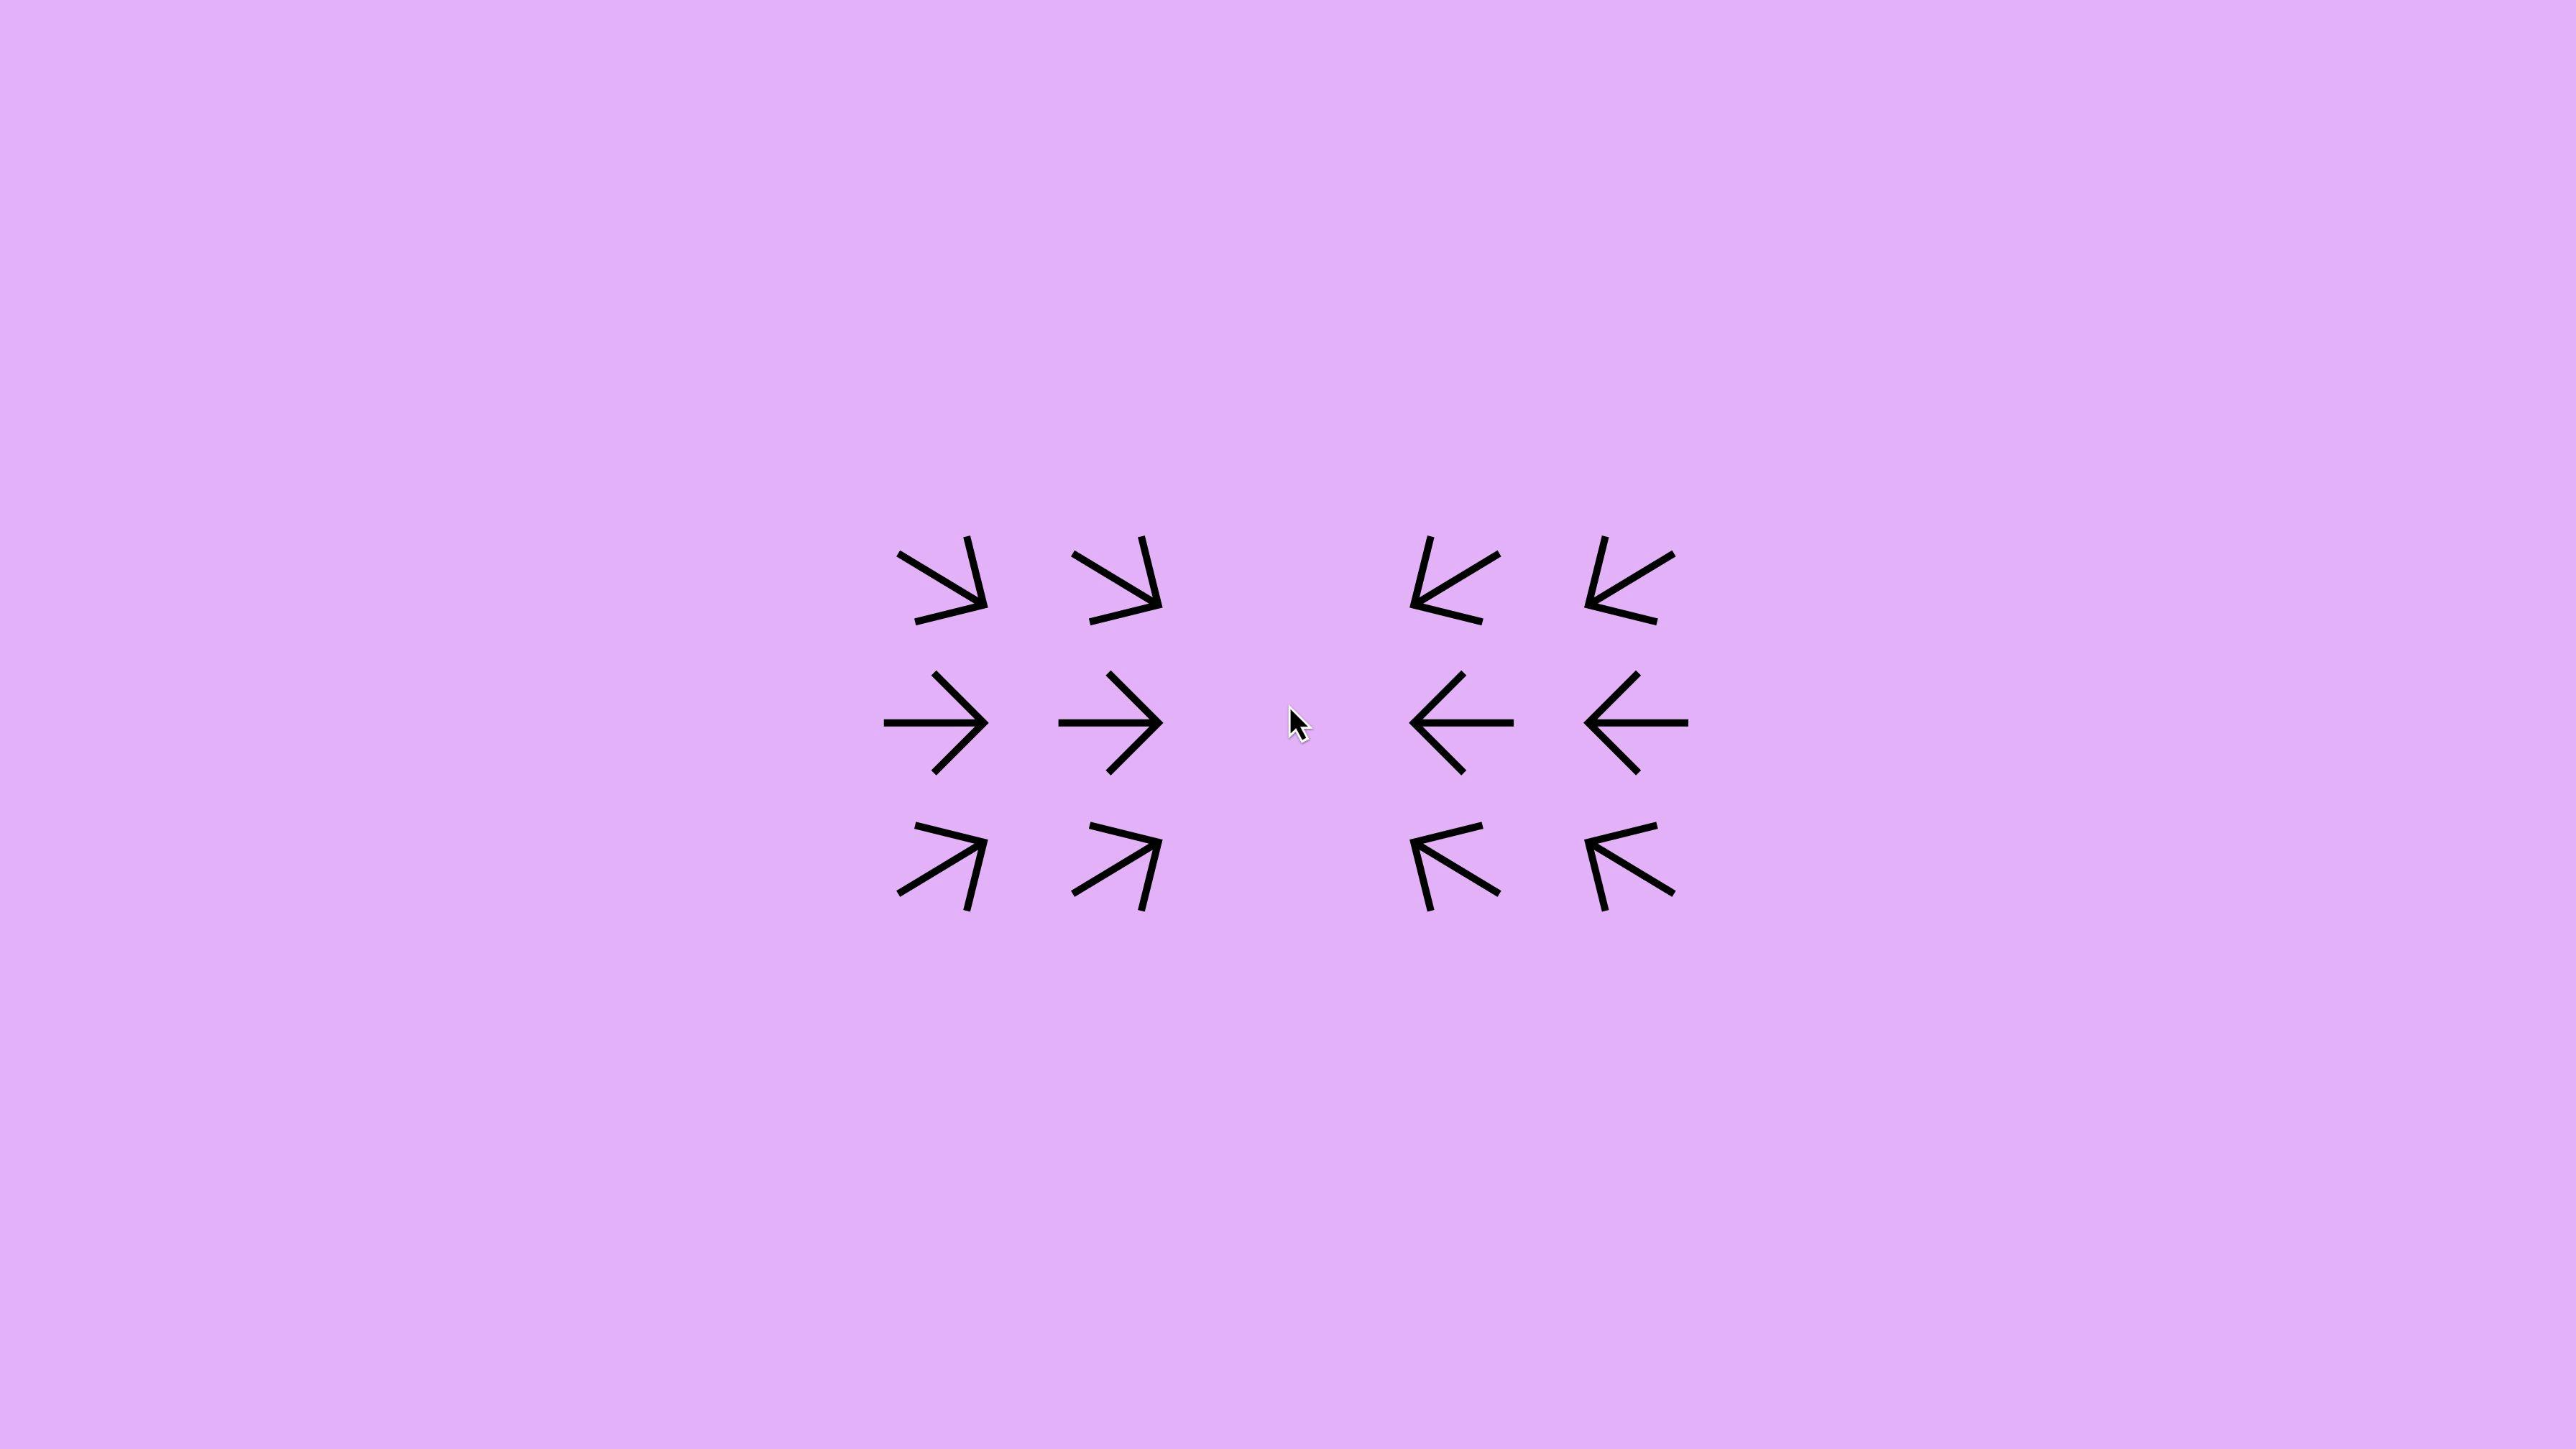

In this post you're going to learn how to animate the direction and rotation of an element using trigonometry, like we did on the Pluto website. In this example, the cursor is like a magnet that attracts the arrows. We apply trigonometry to the arrows so they rotate to point to the cursor. You can use the same logic to do some very cool effects!
Take a look at the final result here.
Basic structure
First, let's create and run a simple Create React App project:
Next, we're going to create the <Arrows /> component and import it in <App />.
The <Arrows /> component will have the target element which will capture the mouse movement. It also will serve as a wrapper for the arrows that will follow the mouse.
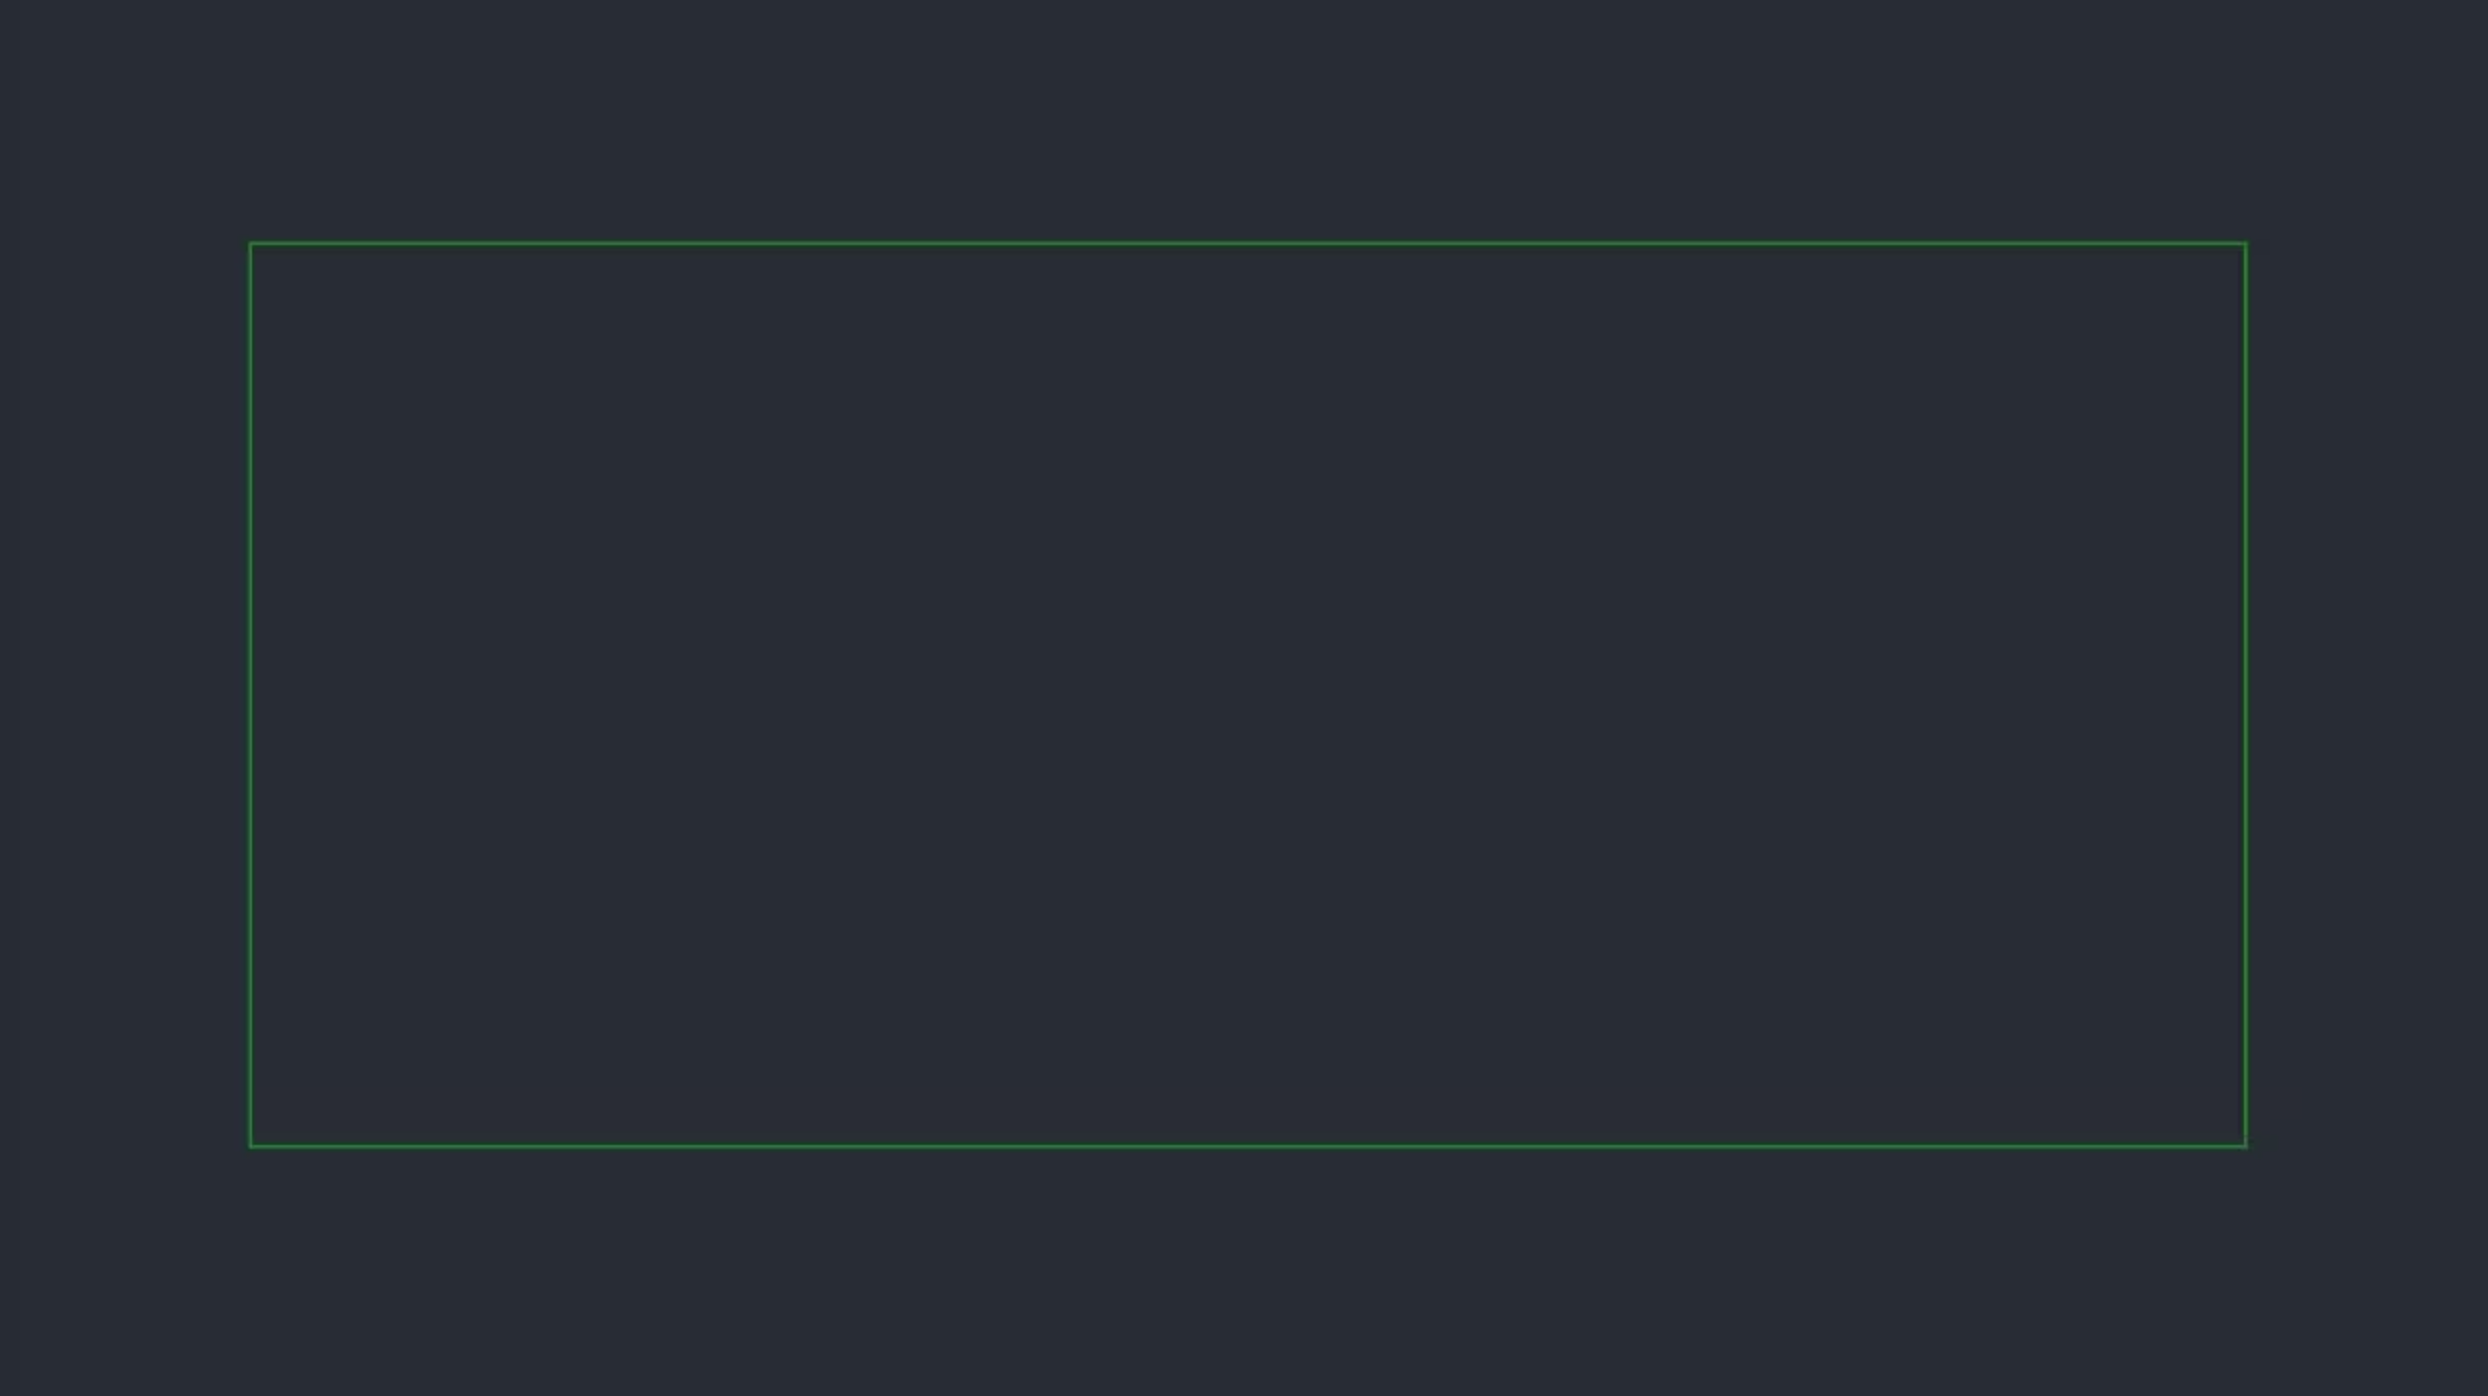
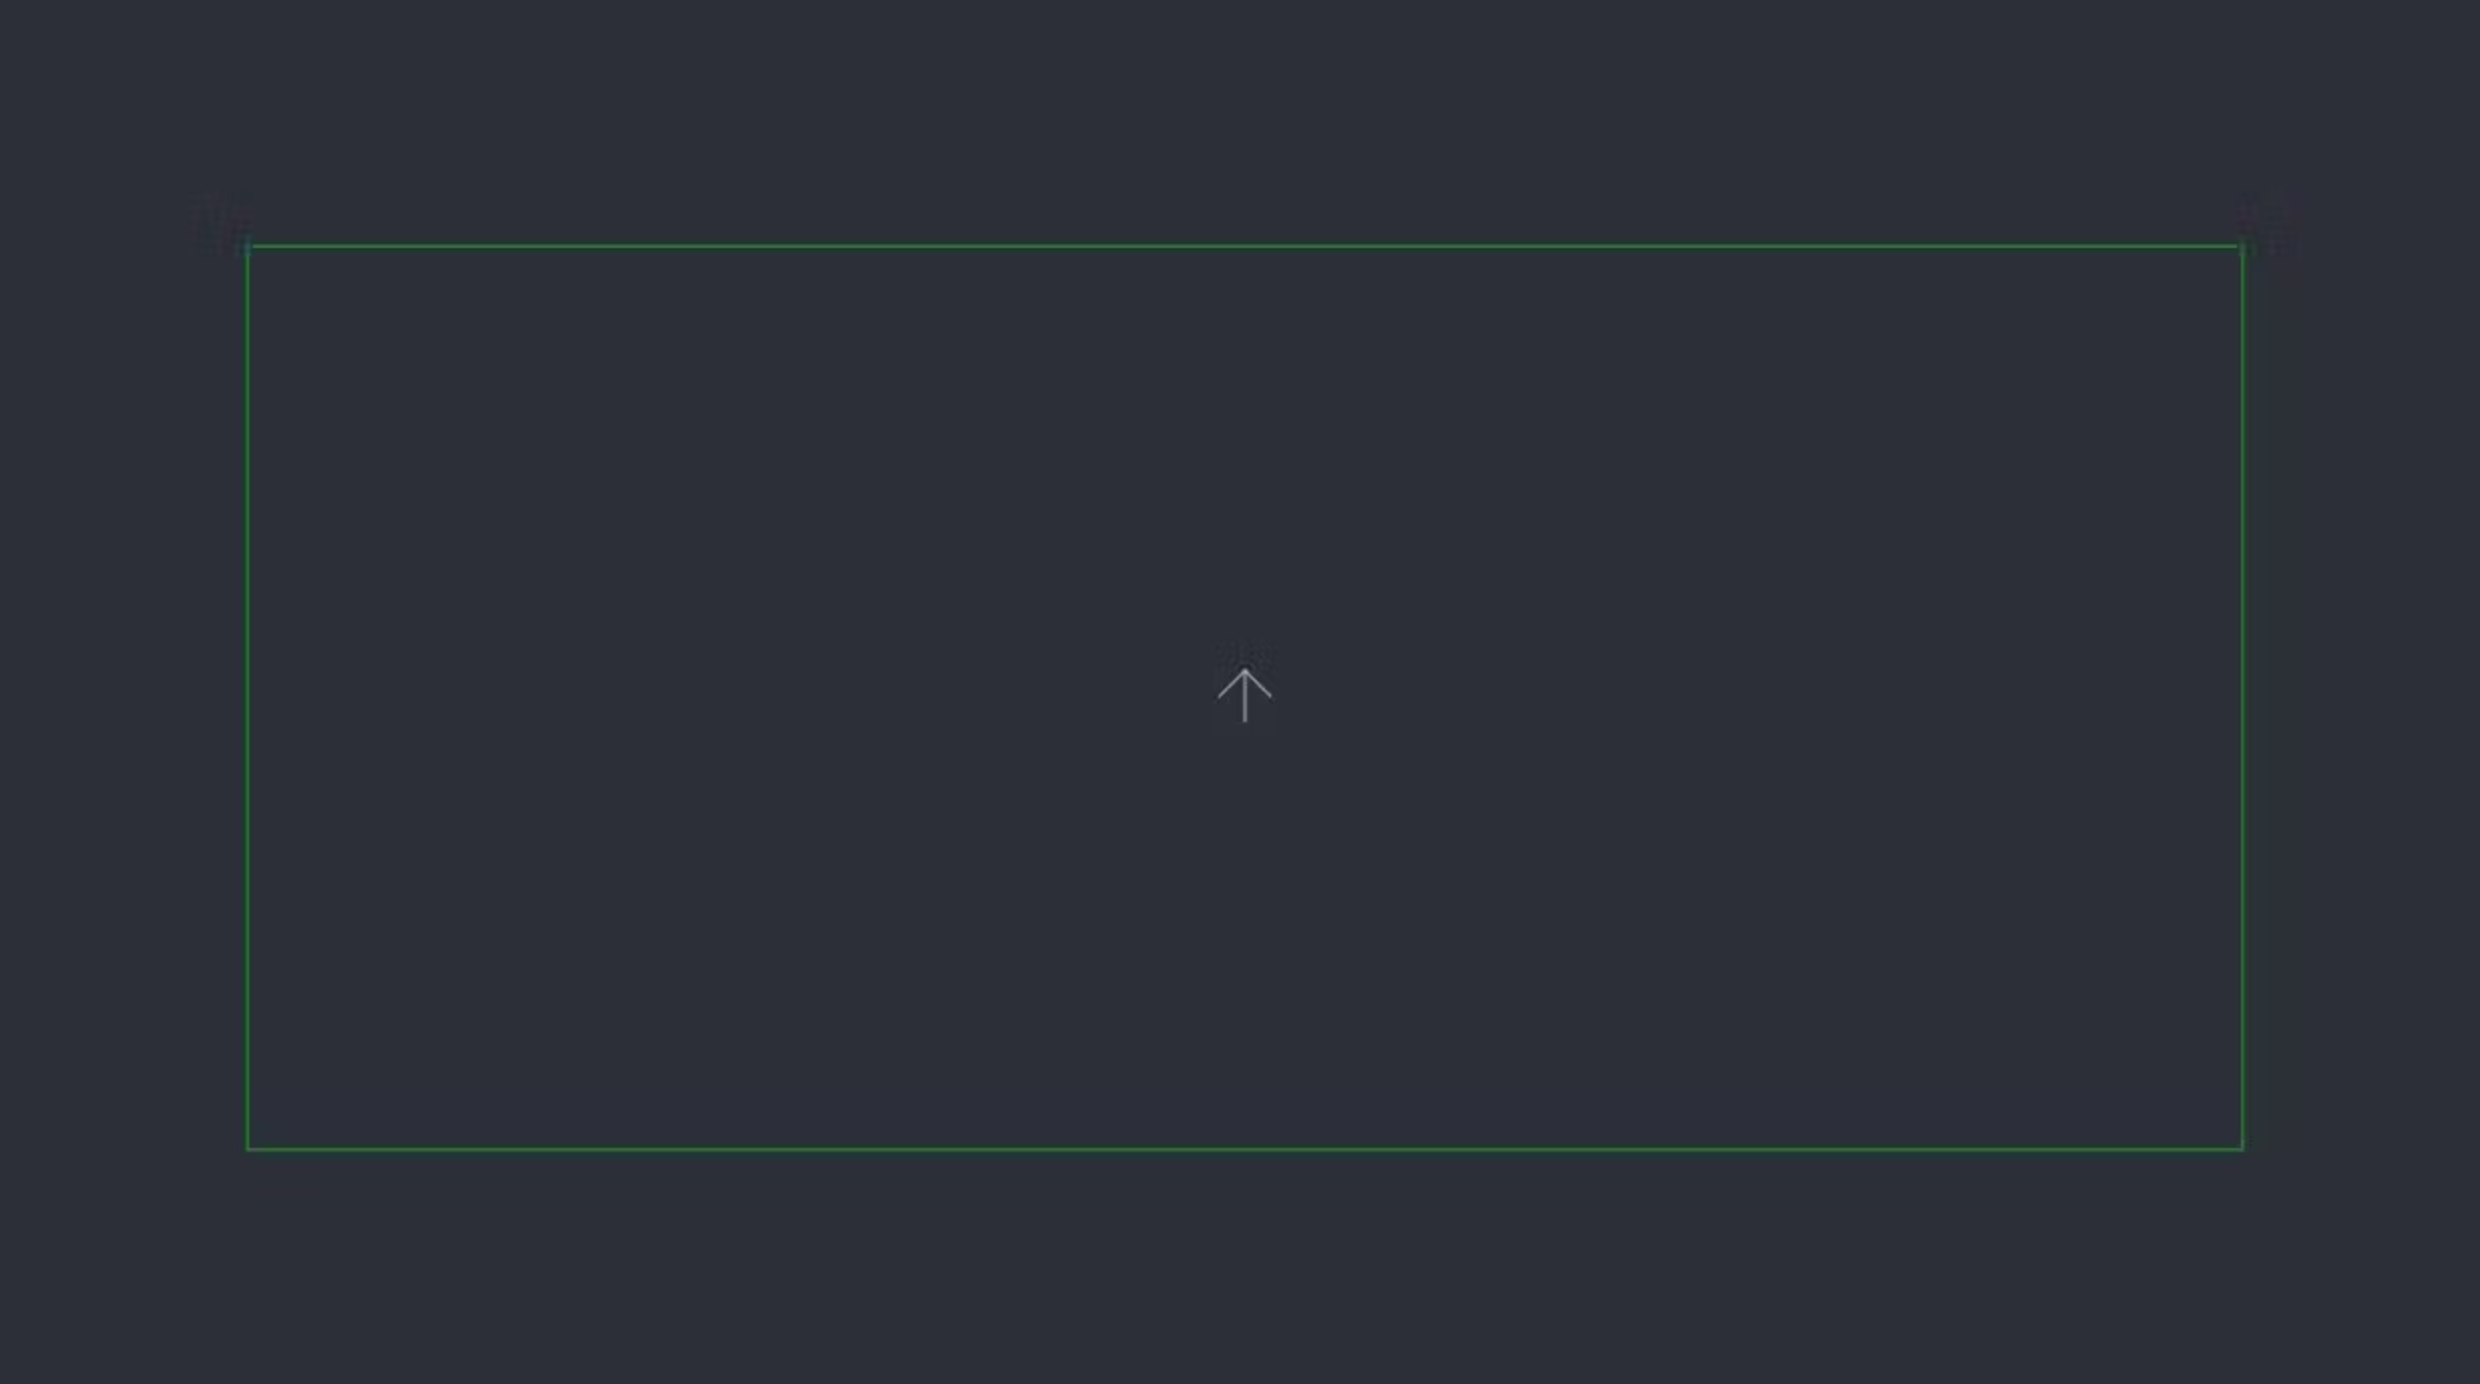
We can add some CSS to make it easier to see where the target area is, adding a border to it. Of course, the target area can be of whatever size you want — it could even be fullscreen. But let's keep it simple for now.
This is what we have so far, a green rectangle to show where the target element is:
Mouse events
We're going to add mouse events to the target element.
Add onPointerEnter and onPointerLeave to check whether the mouse is hovering the area or not, and save it in a state with React useState.
Also, add onPointerMove to capture mouse position. It should call onMouseMove function and save the x and y coordinates using React useRef.
Arrow component
Ok, now we can add the component that will rotate.
Create an <Arrow /> component and add it as children of the target element in <Arrows />.
It should receive three properties from parent: initialRotation, mouse and isMouseOver. initialRotation should be in degrees and define the default position of the arrow. Then we pass the mouse coordinates ref and the isMouseOver state.
The <Arrow /> component returns a wrapper div that will receive the rotation and a ref (will explain this later). So we can apply the initial rotation to the wrapper div with the prop style.
It also has a child, the svg arrow that is being imported as a react component.
Ok, we have all the components and the structure we need. The arrow might appear at the center of the target rectangle, and might be pointing up because we defined 0° as initial rotation.
We just need to make it rotate!
requestAnimationFrame()
The mouse can be always moving and updating its position, so to make the arrow follow it in time, it needs to have its rotation always updating as well, in each frame. To achieve this, we're going to use requestAnimationFrame. In React, it's easier to use the useRafLoop hook from react-use, so let's install and import it.
Lerp function
We also need a lerp function to animate the arrow rotation. If you don't know what a lerp function is...
Linear interpolation, or ‘lerp’ for short, is a technique commonly used when programming things like games or GUIs. In principle, a lerp function ‘eases’ the transition between two values over time, using some simple math.
We're going to save the lerp values (current and target) in the angle ref, and initialize it with the value we defined in initialRotation prop.
getBoundingClientRect()
Another important thing we need is the bounding client rect of the arrow, so we can get information about the size of the arrow element and its position relative to the viewport. Create a ref and call the getBoundingClientRect() function as soon as the element is mounted, with the useEffect hook.
Putting all together
Let’s make the arrow move. Add the useRafLoop hook that will run at each frame.
In the first row inside it, make sure arrowRef and arrowRect have been initialized. Add an if statement and return before proceeding with the code if the values are empty.
We need to set the target angle that will be used by the lerp function to animate the rotation. Add another if/else statement to check the isMouseOver prop. If the mouse is over the green rectangle we defined as our target area, we make it follow the mouse, otherwise, just set it back to the initial position.
Then we’re going to call the lerp function to update the angle.current value, passing three parameters to it. The first one is the angle.current itself, that will be updated. The second one is the angle.target we just set, so lerp can make a transition between these two values. And the third one is the range, a number between 0 and 1. It’s like the “speed” of the animation: the lower the number, the slower the animation becomes.
At the end of the raf loop, we can pass the angle.current to the rotation of the arrow element.
You won’t be able to see any difference so far. The most important part of the logic is still missing. We need to set angle.target when the isMouseOver prop is equal to true.
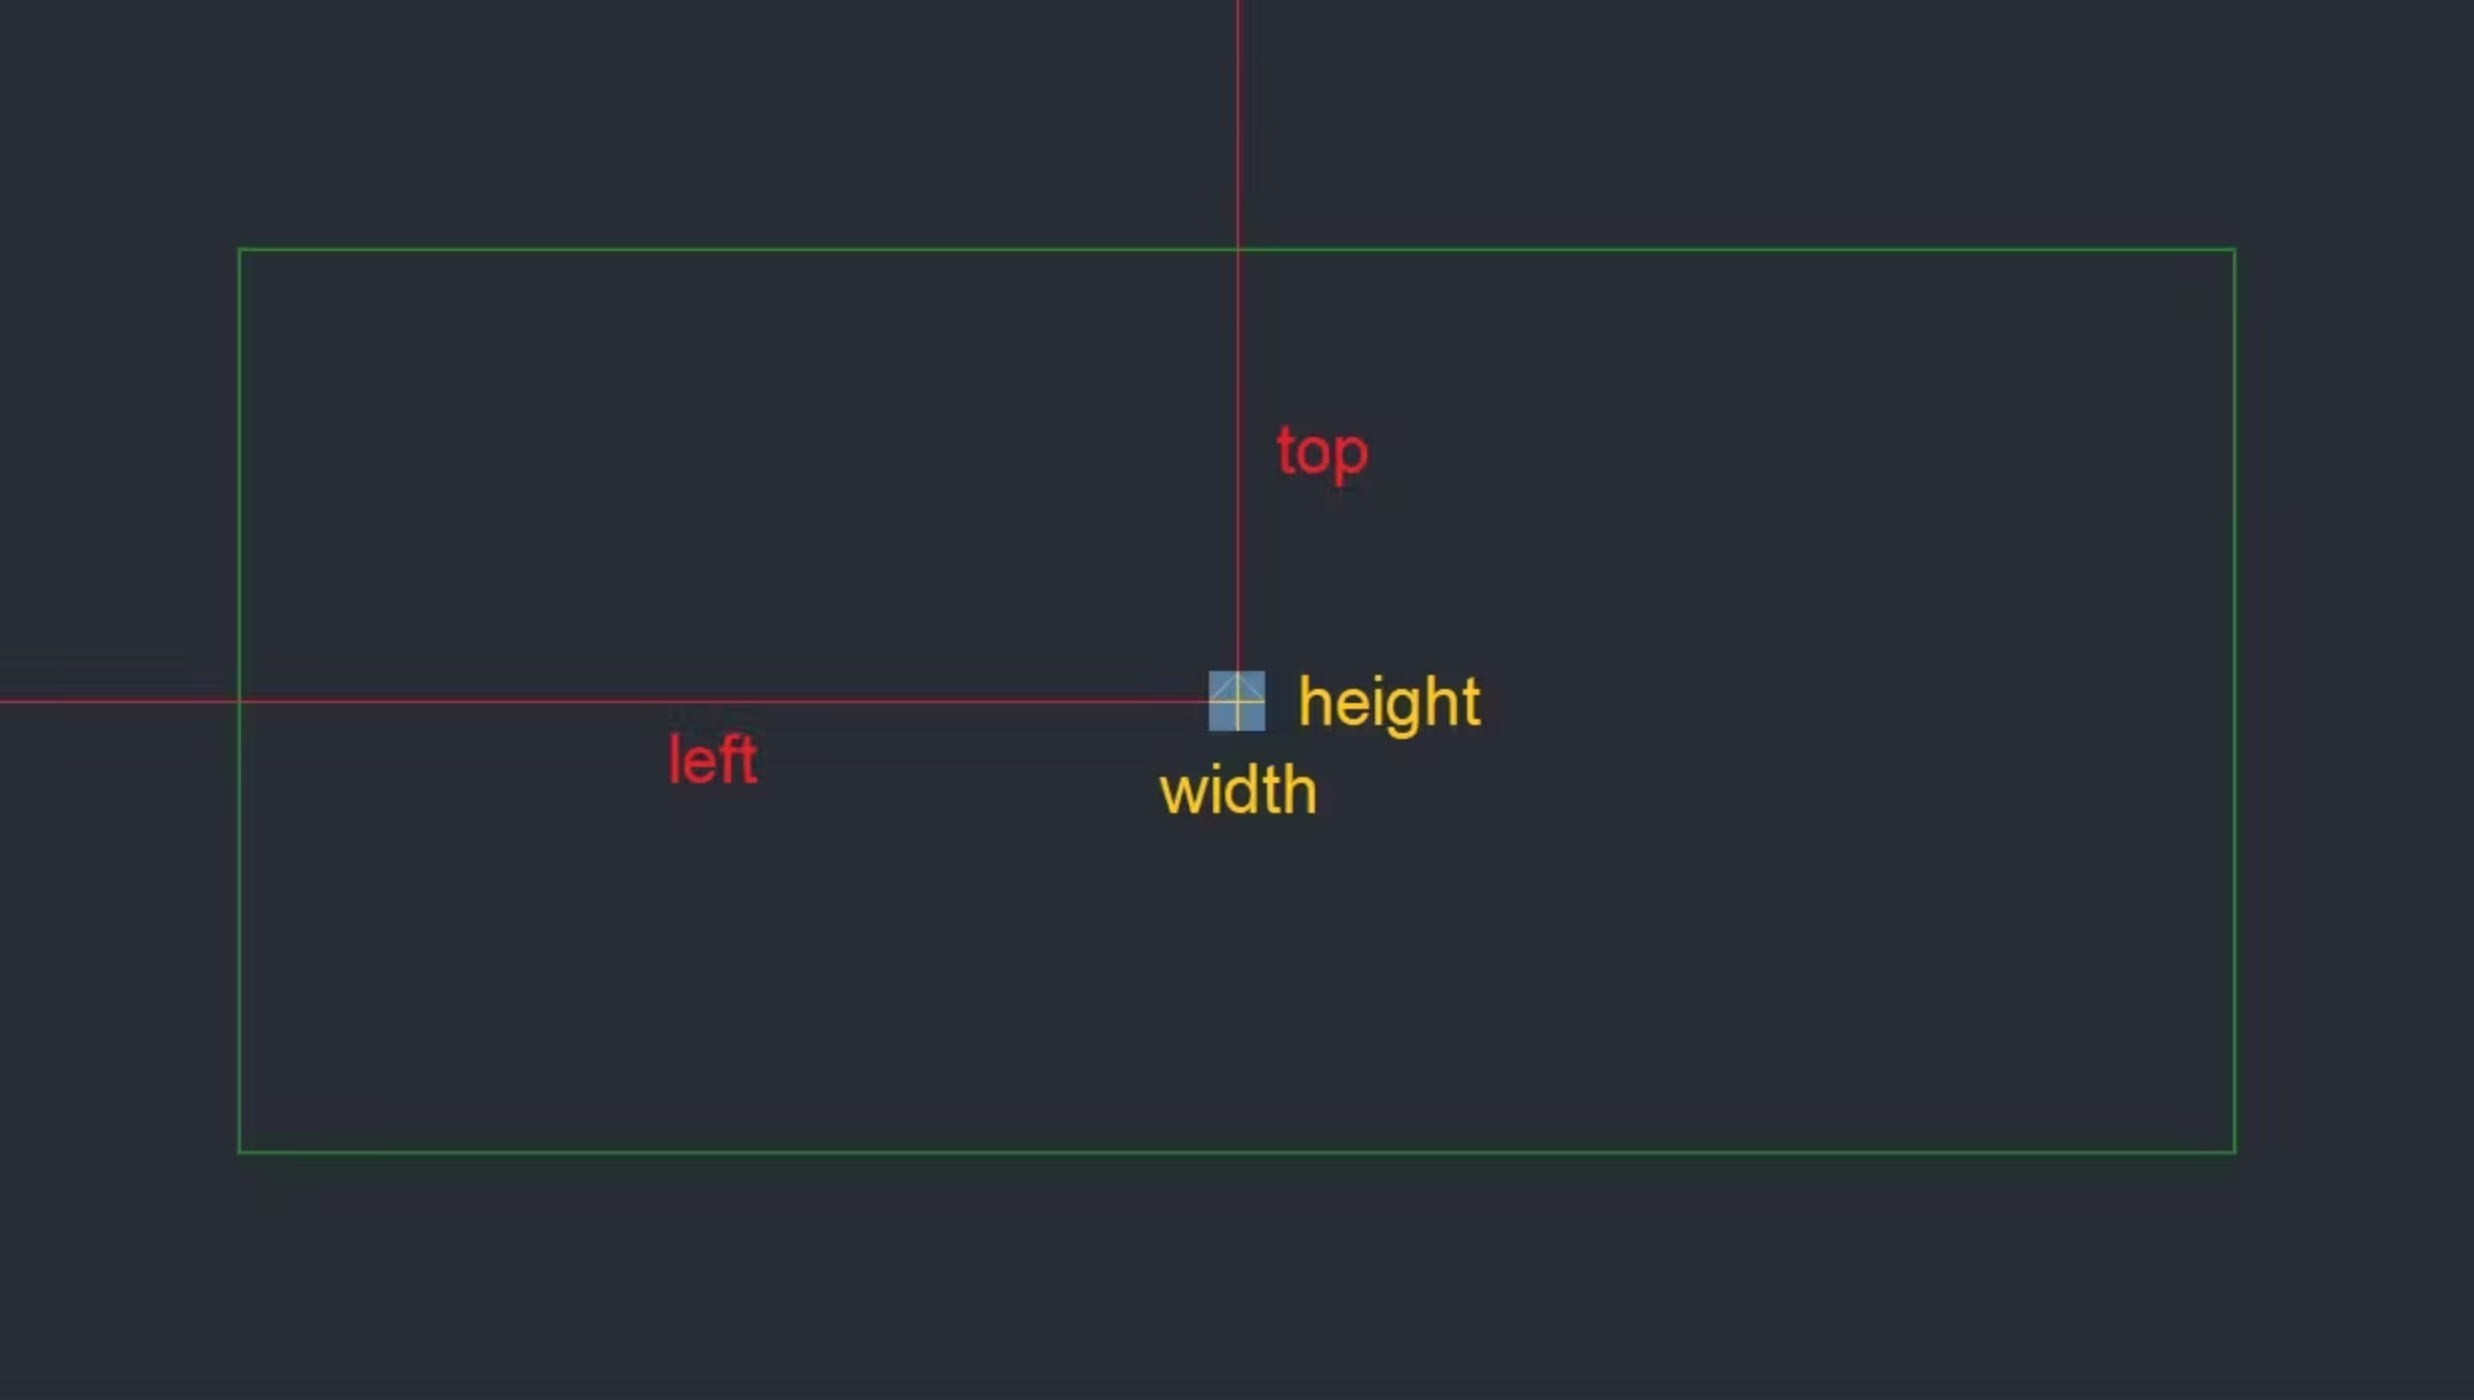
It’s time to use the getBoundingClientRect values we saved in arrowRect ref. We need to use width, height, left and top in order to calculate the position (x and y coordinates) of the center of the arrow element. For the x coordinate we just need to sum the left value with half width (width / 2), and for the y coordinate, sum the top with half height (height / 2).
Calculating the target angle with trigonometry
The target would be the angle we’re going to rotate the arrow. As you can see in the image below, the line connecting the center of the arrow to the mouse position, along with the x and y axes, forms a right triangle. The red question mark is the angle we're going to calculate.
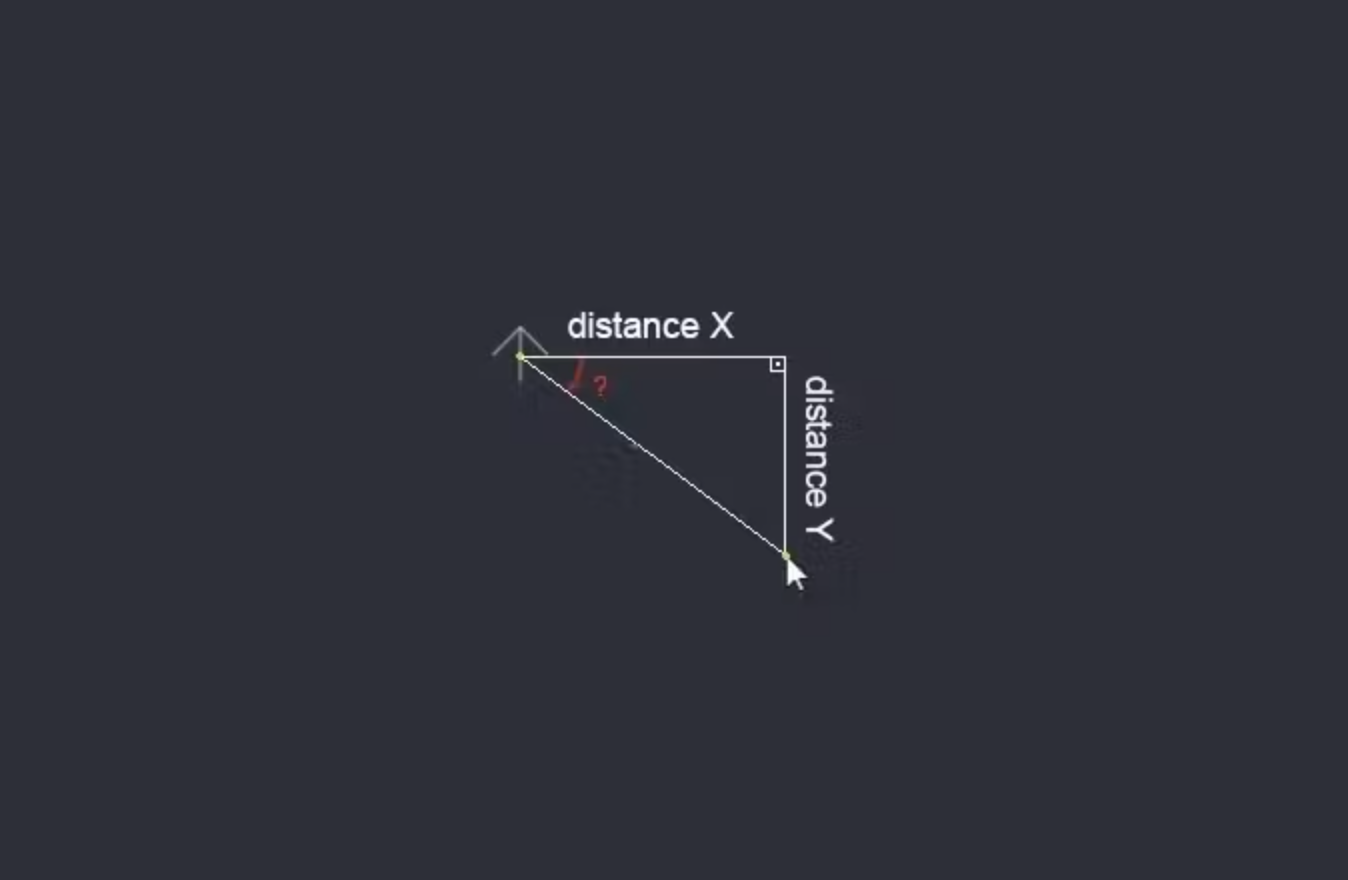
First, we should calculate the distances x and y by subtracting the arrow center position from the mouse position. Considering a right triangle, the distanceX is the adjacent side, and the distanceY is the opposite side of the angle.
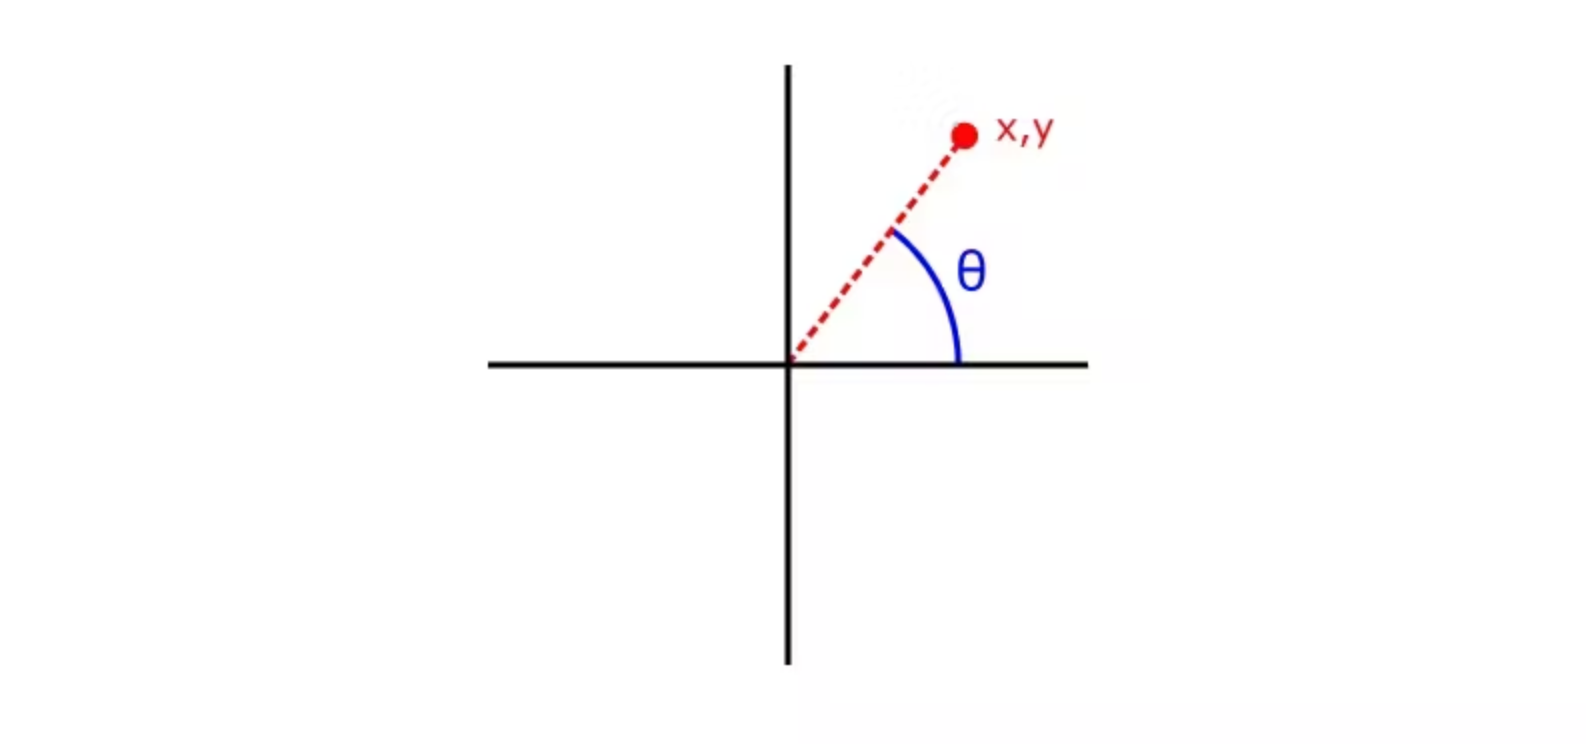
We can use one of the trigonometric ratios: sine, cosine and tangent. As we have both adjacent and opposite sides’ values, the most suitable function to use in this case is the tangent. The the formula is:
Tan θ = Side opposite to θ / Adjacent side to θ
Actually, we don’t really need to know the tangent of the angle, but the angle itself. That’s why we should use arc tangent, or Math.atan2 function.
The Math.atan2() method returns a numeric value between -π and π representing the angle theta of an (x, y) point. This is the counterclockwise angle, measured in radians, between the positive X axis, and the point (x, y). Note that the arguments to this function pass the y-coordinate first and the x-coordinate second.
Using Math.atan2
We call the Math.atan2 function passing the distances and reversing the sign of the second parameter to rotate in the correct direction. It returns the angle in radians.
We could use it like that, but I personally prefer to convert it to degrees, as it’s easier to understand. To convert from radians to degrees, just multiply the angle in radians by 180 / Math.PI — then we have the target value.
We finally can see the arrow moving! But there’s something wrong. When the rotation reaches 180°, the arrow rotates 380° to the opposite side. For example, if you’re moving the mouse clockwise, after you reach 180°, instead of continuing rotating clockwise to 181°, it rotates 360° counterclockwise to -179°.
The closest angle
To fix that, we need to calculate the angle closest to the current position. 180° is closer to 181° than -179°. Add the closestAngle function and call it before the line where we set angle.current. We should update angle.target again with the new value.
Problem solved!
Scrolling the page...
We’re almost there. Everything seems to be working, but there’s another issue. When the page is scrolled down, the arrow doesn’t follow the mouse correctly anymore. Our page is not scrollable at the moment, so you can duplicate the <Arrows /> component in App.js for now, just for testing.
Scroll the page a little and you’ll be able to see the issue.
This happens because the top value of our arrowRect is always the same, regardless of how much the page is scrolled down. We need to update the top value on scroll, so we can calculate the correct top value we need.
Save the top value in a ref when the component mounts, right below we set the arrowRect.current.
And using this ref, we can now calculate the currentTop in each frame and use it instead of arrowRect.current.top. We have to subtract the window.pageYOffset, that represents the amount of pixels the page is scrolled down, from the initialTop ref.
Ok, looks like it’s fixed!
Resize
There’s just one more issue… Try to resize the page and you’ll see it stops working again! We need to update arrowRect and initialTop everytime the page is resized. Add a resize listener to the useEffect hook.
Great! We’re done with the adjustments.
Add more arrows!
Let’s add more arrows to make our experiment even cooler.
Here’s the final result.
That’s all! I hope you enjoyed it. Have fun!